Ordering new flooring? The first step is making sure you know exactly how much you need. Accurate measurements save you money, avoid waste, and ensure a professional-looking installation.
This guide explains how to measure floors for carpet, vinyl, LVT, and laminate, including tips for irregular-shaped rooms, alcoves, and doorways.
Whether you're planning to DIY or hiring an installer, these steps help you get it right.
Table of Contents
-
Why Accurate Measurements Matter
-
What You'll Need
-
Step-by-Step: How to Measure Floors
1. Clear and Prepare the Room
2. Measure the Length and Width
3. Account for Irregular Shapes
4. Include Alcoves and Recesses
5. Factor in Doorways and Thresholds
6. Add Extra for Cutting and Fitting
-
How to Calculate Total Flooring Needed
-
Pro Tips for Measuring Floors
-
Final Note: Order with Confidence
Why Accurate Measurements Matter
Getting your measurements right means:
-
You’ll order enough material without paying for waste.
-
Your flooring will fit neatly without unsightly joins or gaps.
-
Installers can cut and fit faster.
-
You’ll stay on budget and avoid surprises.
For carpet, vinyl, LVT, and laminate alike, measuring properly is essential.
What You'll Need
-
Tape measure (at least 5–8 m)
-
Graph paper or notebook
-
Pencil or pen
-
Calculator
-
Optional: Laser measure for large rooms
-
Camera for noting tricky areas
Step-by-Step: How to Measure Floors
1. Clear and Prepare the Room
-
Move furniture out of the way.
-
Sweep or vacuum for clear lines.
-
Check for features like steps, columns, or built-in units.
A clear floor makes measuring more accurate.
2. Measure the Length and Width
-
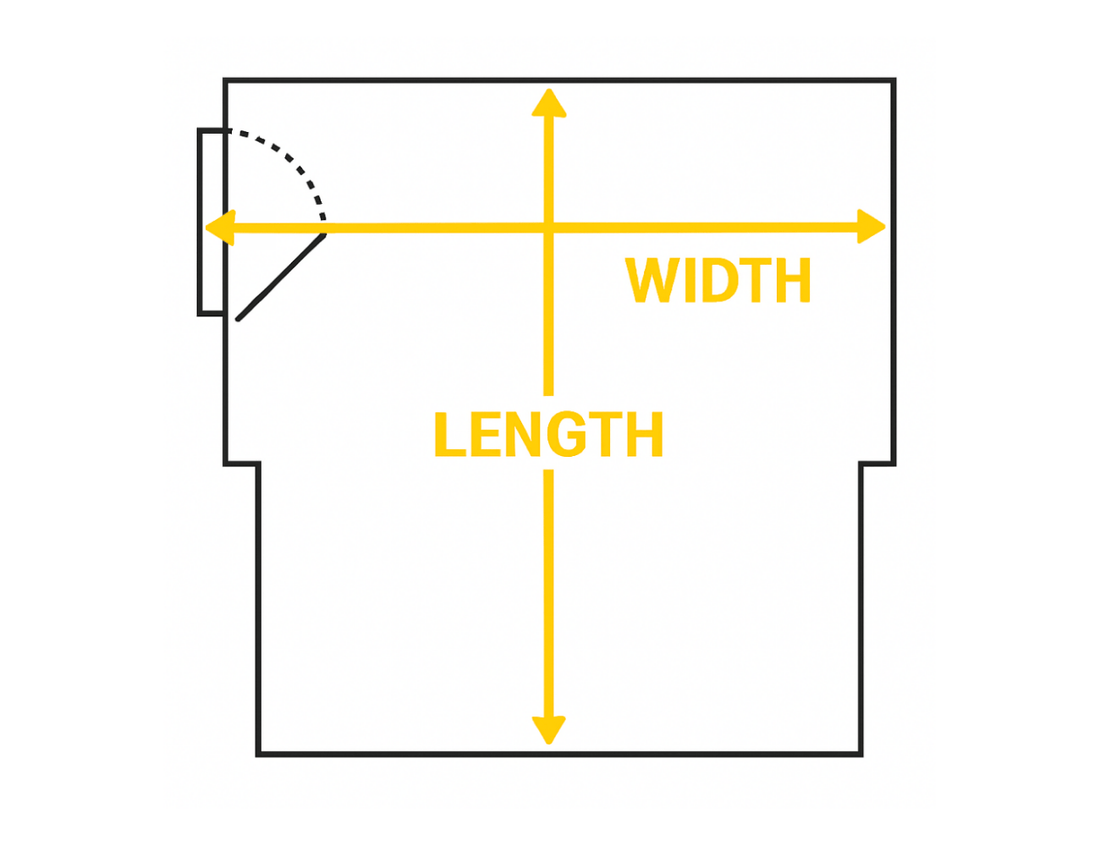
Measure the longest length of the room wall to wall.
-
Measure the widest width at the room’s broadest point.
-
Always measure in multiple places as some walls aren’t perfectly square.
-
Use the largest measurements for your order.
Pro Tip: Record all dimensions clearly with sketches if needed.
3. Account for Irregular Shapes
-
For L-shaped or awkward rooms, split them into rectangles or squares.
-
Measure each section’s length and width separately.
-
Add these individual areas together for the total.
Example:
-
Area 1 = 3 m × 4 m = 12 m²
-
Area 2 = 2 m × 2.5 m = 5 m²
-
Total = 17 m²
4. Include Alcoves and Recesses
-
Measure bay windows, fireplaces, or built-in wardrobes if flooring goes behind them.
-
Don’t skip small recesses as they still need to be covered.
-
Sketch your plan showing where these features sit.
5. Factor in Doorways and Thresholds
-
Measure the flooring that needs to extend through doorways.
-
Note transitions to other rooms or flooring types.
-
Account for extra material if you need to overlap thresholds or use transition strips.
6. Add Extra for Cutting and Fitting
-
Always allow for cutting waste and fitting.
-
Add at least 5–10 cm to each dimension.
-
For patterned vinyl or LVT, consider extra to match the design.
-
Irregular rooms often need more cutting so plan 5–10% extra overall.
How to Calculate Total Flooring Needed
For square or rectangular rooms:
-
Length (m) × Width (m) = Area in m²
For multiple areas:
-
Calculate each separately and add together.
For flooring sold in packs (LVT, laminate):
-
Divide total area by pack coverage (e.g. 2.2 m² per pack).
-
Always round up to full packs.
Learn more about our flooring options
Pro Tips for Measuring Floors
-
Double-check all measurements before ordering.
-
Draw a simple floor plan with sizes marked.
-
Measure in centimetres for accuracy.
-
Note any height changes or steps if needed.
-
For stairs, measure tread + riser for each step if carpet is going over them.
-
For vinyl sheets, order to the widest width because they’re cut from rolls.
Final Note: Order with Confidence
Measuring carefully is the key to a beautiful, professional flooring result.
Whether you’re laying carpet, vinyl, LVT, or laminate, accurate measurements help avoid waste, save money, and make installation smooth.
